Greetings, fellow crafters! Are you ready to embark on a delightful crafting adventure? Today, I’m excited to guide you through the process of creating your very own Embroidered Necklace—a charming accessory that combines the art of embroidery with the elegance of jewelry. Whether you’re a seasoned stitcher or new to the world of embroidery, this project is sure to spark your creativity and leave you with a beautiful piece to cherish or gift to a loved one. So, let’s gather our supplies and dive into this fun and rewarding DIY project!
Contents
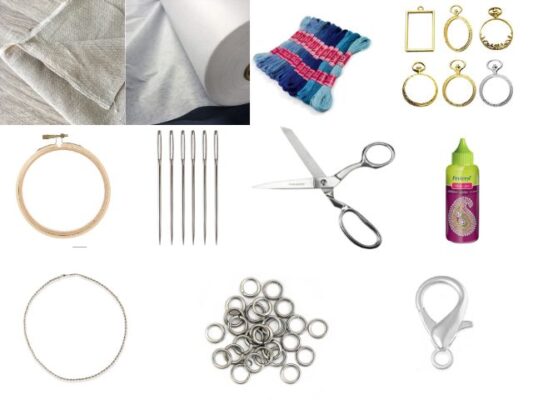
Materials You’ll Need
- Base fabric (felt or linen)
- Iron-on interfacing
- Embroidery threads in assorted colors
- Pendant bezel setting
- Embroidery hoop
- Embroidery needles
- Scissors
- Fabric glue
- Chain or cord
- Jump rings
- Clasp
Step 1: Design Your Pendant
Begin by selecting a design for your pendant. This could be anything from a simple geometric pattern to a intricate floral motif or even a personalized monogram. Sketch your chosen design onto the base fabric using a pencil or fabric marker, making sure it fits within the dimensions of your pendant bezel.
Step 2: Prepare Your Fabric
Layer your base fabric with iron-on interfacing to provide stability and structure. Place the fabric in an embroidery hoop to keep it taut and secure while you work. This will help ensure precise stitching and prevent any puckering or distortion of the fabric.
Step 3: Stitch Your Design
Thread your embroidery needle with your chosen colors and begin stitching your design onto the fabric. You can experiment with different embroidery stitches such as satin stitch, backstitch, or French knots to add texture and detail to your pendant. Take your time and enjoy the process of bringing your design to life with each stitch.
Step 4: Finish and Assemble
Once you’ve completed your embroidery, carefully remove the fabric from the hoop and trim any excess fabric from the edges. Apply a small amount of fabric glue to the back of the fabric to secure it in place.
Next, place the embroidered fabric into the pendant bezel setting, ensuring it fits snugly. Use fabric glue to secure the fabric to the setting, then allow it to dry completely.
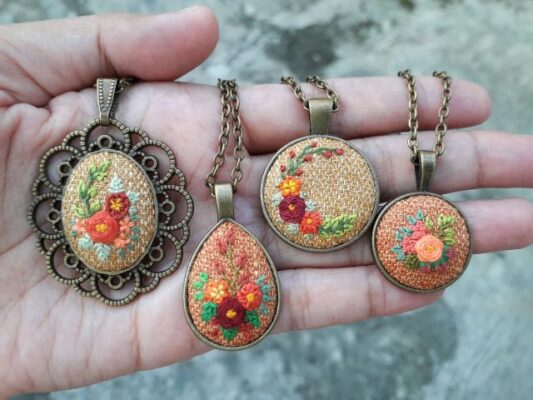
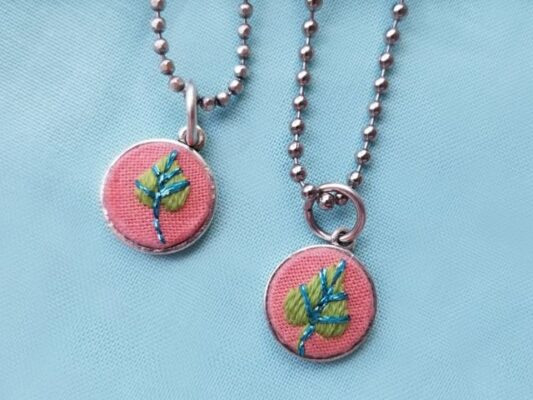
Step 5: Complete Your Necklace
Thread a chain or cord through the loop on the pendant setting, adjusting the length to your preference. Attach jump rings and a clasp to the ends of the chain to complete your necklace.
Congratulations! You’ve successfully crafted your very own Embroidered Necklace—a unique and beautiful piece of jewelry that showcases your creativity and craftsmanship. Admire your handiwork and wear your necklace with pride, or present it as a thoughtful gift to someone special.
Thank you for joining me on this creative journey! I hope you’ve enjoyed learning how to make your own Embroidered Necklace. Whether you’re a seasoned embroiderer or a beginner, this project is a fun and rewarding way to express your creativity and make something truly special. Happy crafting!
Related Posts
- Let’s Celebrates America As A Nation Of Diverse Readers
- How Far Is The Universal Studios From Disneyland?
- Ways to Make Planner Stickers By Yourself